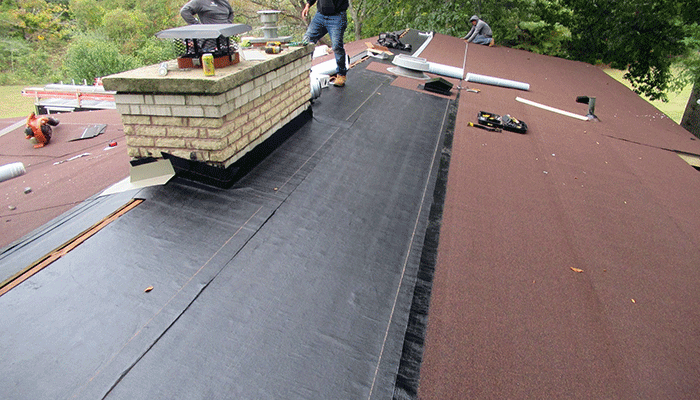
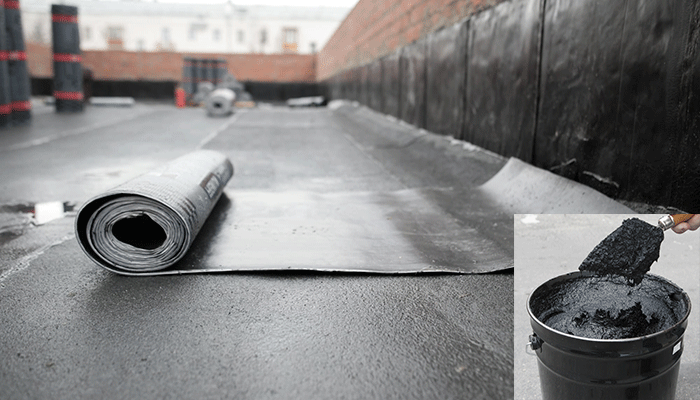
Roof rolling is quite trendy nowadays. And it is one of the cheapest solutions as well to your outdoor roofing problems.
It is a mineral-surfaced rolled roof covering that is based on oil and asphalt products. Usually, people install roof rolling in rooftops, any uninhabited buildings, structures such as garages, shops, garden sheds, workshops, and other small buildings.
The installation process of roof rolling is simple and easy. Although there are different types of roofing rolls available, the core installation process is almost the same. You just need to have an in-depth idea on how to install roof rolling.
The process is not too tough to follow for the roofers or to do it by yourself. Let’s discuss this matter more in the following section.
How to install roof rolling: Step by Step
Roof rolling works best for low-inclined roofs. It weighs almost 75 pounds per roll and each roll contains 100 square feet of the material.
If you follow a couple of instructions or steps, you will be able to install your roof rolling. These steps are-
Step 1: Analyze your Roof
Firstly, analyze your roofing conditions. Whether your roof is suitable for applying roof rolling or not, or whether it is low sloped or not. Also, consider the pitch of the roof before proceeding to the process.
For mineral surfaced rolls, the pitch requirement is 1: 12 or larger which means the roof must rise 1 unit for every 12 unit change in horizontal space. For shingles of asphalt or composite materials, this requirement is 4: 12 or larger.
After a brief analysis, make a decision and then select the roof rolling material.
Step 2: Select the material
There are a lot of varieties of roof rolling available in the market. Mainly, roof rolling materials are all mineral surfaced, but choices vary according to your roofing conditions, preferences, and budget.
Tyvek Protec 200 Roof Underlayment Roll, and Weather Watch Mineral surfaced leak barrier rolls are some of the most preferred roof rollings.
If you do not have a base for the rolling, you must ensure it. The base is normally made of plywood or OSB. For the base, most workers prefer OSB in terms of cost efficiency and usability.
Step 3: Clamp the rolling
After the base is secured, the next thing is to set the rolling paper. For this, you need the measurements of the rolling paper.
You have to clamp the rolling paper at one end of the roof.
Step 4: Attach the Rolling paper
When the clamp ensures the on-end attachment, then make sure to fold the roofing rolls as you will peel the adhesive below the underlayment to attach it to the plywood or OSB.
Now, peel the strip off and then, lift the folding part and roll it over. Repeat the whole process until you come to the end of your roof.
Step 5: Labeling the surface
When you attach all of the rolling papers to your roof, make sure to label the whole surface from the top of the paper. Labeling ensures there is no space between the rolling paper and base. Thus no space for water leaking as well as chances of tearing off the rolls can be ensured.
Step 6: Trimming the excess off
After setting the rolling paper, when you see from below the roof, the paper should be an inch or three-quarters of an inch larger than the roof end. This ensures the proper water management and also protects your roof from snow.
You should trim any excess roofing rolls in such a way that they maintain the above-mentioned measurements.
And now, you have finished your installation of a roof rolling!
Do’s and Don’t while installing roof rolling
Always check and if possible double-check the measurement of the number of rolls you need. As miscalculation can cost you loss of materials as well as money.
While you are folding the rolls, do not fold them too hard. Folding too hard can create cracks or breakage to the rolls.
Another important thing is while peeling off the strips, you have to be very careful.
Make sure to wear gloves as the adhesive used in roofing rolls is very strong. If you come in contact with it, it can peel your skin off when you try to remove it.
So, pay extra attention while peeling off the strips. In any condition, if the adhesive gets onto your hand, do not panic. Wash them off and in case of emergency get some medical help.
Pros of Roll Roofing
Roof rolling has some benefits that attract both the homeowners and the constructors.
- It is a very cost-effective solution if you compare it to other shingles such as asphalt or other types of shingles.
- Roof rollings are transportable as they are not very heavy. Transportation of regular shingles is quite a hassle.
- On the other hand, roof rolling is lightweight (only 75 pounds in each roll) and sealed properly.
- No damage usually occurs at its transportation because of the highly efficient packaging technique applied by the manufacturers.
- Another major merit of applying roof rolling is, it is very easily applicable. You only need to fold the rolls and just peel them off.
- The next thing is to attach them. Everyone admires its fast, easy and simple application technique.
- Again, it has no nailing process attached to it which means any problems such as leaking around the nails, screws, overlapping of shingles will not happen.
- If you hammer down nails, sometimes it can damage your flat or low-sloped roof. In such a case, roof rolling is one of the best solutions.
- It also permits you to apply roofing rolls over your existing shingles, but you need to remember to check for any disturbance that may damage the rolls.
Cons of Roll Roofing
There are also some cons to applying roofing rolls to your roof. You must gather knowledge about the cons as in some cases it may seriously damage your roof.
- Roofing rolls have less durability, poor resale value, and also a limited lifespan.
- AS compared to shingles, roof rollings can not easily adapt to any expansion.
- Even if you try to expand it by overlapping rolls, it will eventually degrade and damage your roof.
- A report says that a roofing roll can last from 5 to 8 years whereas the shingles such as asphalt, composite shingles can last up to 25 years depending on the condition of your roof.
- Some roofers simply avoid roofing rolls because they consider it to be more of a temporary solution that will eventually need renovations or repairing.
- Again, it has small color options available and most of the tones are gray, dark gray, black, etc. So, you do not have the choice of selecting from a wide range of colors.
Final words
Now, I hope that you can apply roof rolling to your home by yourself. Or, if you need any help, make sure to get some help from others. You can also consult a professional for any kind of suggestions, measurement checking or process monitoring, etc.
However, you now know how to install a roof rolling and will agree that the process is quite an uncomplicated procedure. If you try it, there is a very small possibility that you will fail.
So, do not worry about failure, just go with your instinct. But make sure you do your research before starting the process.
Happy Roofing!!

![How To Install Roof Rolling? [Step-By-Step Process] How To Install Roof Rolling](https://RoofingHow.com/wp-content/uploads/2021/12/Install-Roof-Rolling-4.png)

![How To Install Rubber Roofing? [Step-By-Step] How To Install Rubber Roofing](https://RoofingHow.com/wp-content/uploads/2021/11/How-To-Install-Rubber-Roofing-556.png)

