
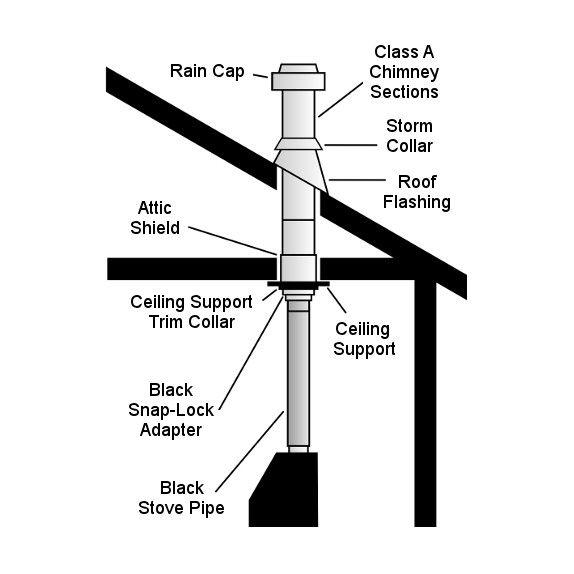
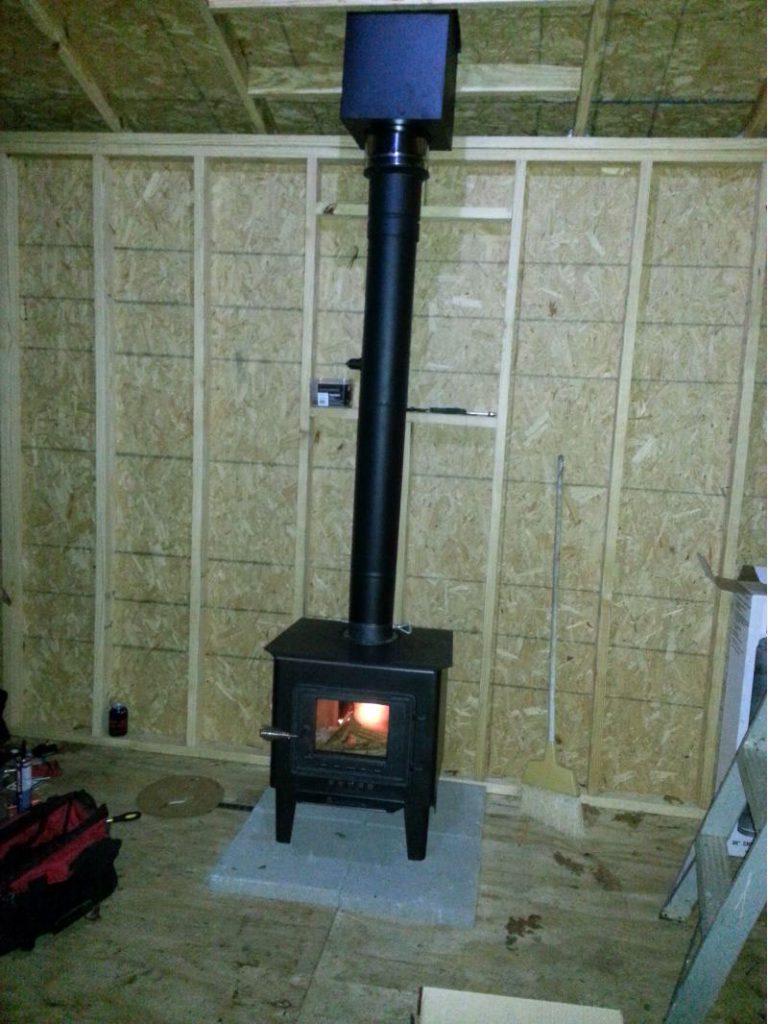
Wood stoves are heat generating equipment that use wood combustible materials to deliver heat indoors. Stove pipe is required to connect these wood stoves with the chimneys. It also prevents smoke from entering the house by transferring it off the heater. That’s why installing the stove pipe is necessary.
Before you install a wood stove pipe, you have to first check your area’s national construction codes. Then you need to insert the stove pipe in the desired location, drill a hole, add flashing, connect the pipe with the chimney, and finally install the chimney cap.
If you want to know the step by step processes in detail about how To Install Wood Stove Pipe Through Metal Roof, keep reading this article.
How To Install Wood Stove Pipe Through Metal Roof?
You know how difficult it is to install the stove pipes through the metal roof. But you need not to be worried; simply follow the procedures outlined below. It will make your work easier.
Step 1: Put the Stove at the right place
Place the wood stove at the location where it will be installed. If you’ve previously done so, you’ll be one step ahead of the process that makes your work a lot simpler. To serve as a guide, set one portion of the pipe of chimney with the stove connector.
Step 2: Draw the mark
To mark the pipe’s center on the roof’s covering plywood, use one plumb bob. Then cut a hole in the location where you drew the mark, also make sure that the hole is big enough to enter the metal roof via it. This step is executed to create an actual hole in the core of the chimney.
Step 3: Create the diameter outside the hole
This step will become simple when you have the accessibility to use a sketching compass. You have to measure the outer diameter of the hole that is required for your chimney. It should be done on the metal roof’s external surface. Always keep an eye on the guidelines provided by the manufacturer and any applicable building codes.
Keeping at least 2 inches of space between the surface of the pipe and the surrounding stuff is highly recommended. Because when the chimney is in action, installing it so close might cause a fire hazard.
Step 4: Make a Hole
Grab your jigsaw, then cut a hole in the roof and the plywood with a composite blade. Place the covering over the hole that is just created. Drop the flashing few inch downward. Draw a line to the top part of the edges using a pencil. Before moving on to another step, cut through the flashing wherever the line is set by using the sharp cutters.
Step 5: Put the Flashing In
You can insert the top part of the flashing underneath the roof and roof paper after you have drawn a line. Then slide all over the hole in the chimney pipe. To elevate the roof few inches, apply half inch bead of external quality caulking.
It must be half inches above the roof’s end where it touches the surface of the flashing. Repeat, but this time push down under the outer part of the base to attach with the flashing.
Step 6: Assemble the Chimney Together
Bring the chimney together according to the instructions which come with the chimney. After completing the assembling, install the chimney along with the flashing collar through the hole of your roof. Then you have to place the lower part of the chimney on to the flange of the wood stove.
Step 6: Install the chimney cap
Before finishing, ensure the pipe is firmly attached and make sure it’s level with the roof’s surface. Caulk must be used to secure the flashing in place, and screws can be used to hold it in place. The screws need to be placed into the sides of the flashing rather than the lower edge.
Now install the chimney cap according to the manufacturer’s instructions. Apply a tiny quantity of caulk to the flashing on both sides. It should be wrapped around any holes in the collar to keep moisture and water out.
Verdict
I hope you found this content helpful. And you now know how To Install Wood Stove Pipe Through Metal Roof.
Burning wood is a wonderful way that can save money on your total heating costs. It can also offer a pleasant atmosphere for those who like to sit by the fire.
So, to install your wood stove pipe, follow the procedures given above and have a great time.
Be cautious while working. Best wishes.


