
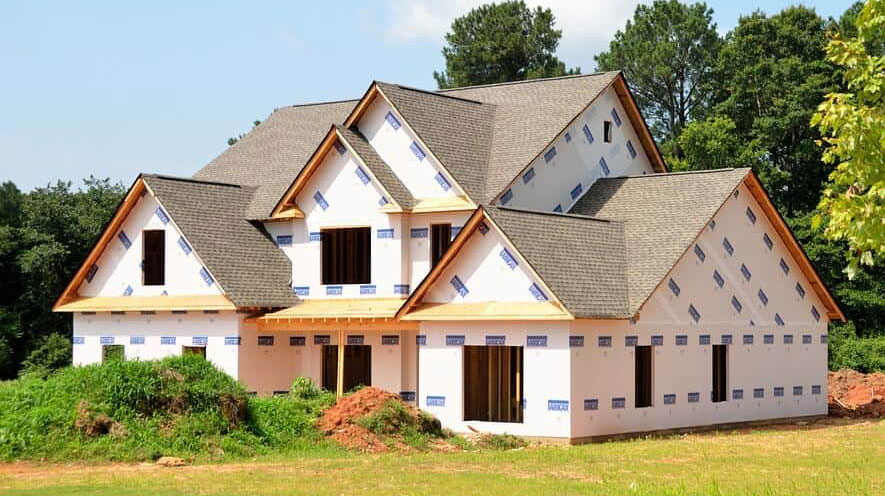
Roofs are made of different types of materials and roofs of different structures are made. One such roof is the hip roof whose structure is different from many types of roofs.
Hip roof is a kind of roof that is lowered around and attached to the wall. And it is high along the middle like a lot of mountains with the help of a special structure.
It sometimes looks like a pyramid known as a hip roof. Now, you you should have an appropriate idea about the answer to the question “how to roof a hip roof” and get the solution to the ancillary question.
In this content, I will discuss in detail how to create a structure for creating a hip roof and many more.
How to roof a hip roof
Everyone goes out of their way to create a new structure for the roof for some advantage. The hip roof is a roofing structure that has many advantages.
There are many steps to making a hip roof. Now let us know the details about the steps.
Necessary tools
- Measuring tape
- Pencil
- Carpenter’s framing square
- Circular saw
- Nail gun
There are 3 major parts for making a hip roof
1. Measuring and cutting
2. Nailing the hip rafters
3. Finishing
Measuring and Cutting
Step 01:
The first step is to measure the length and width of the house. You have to measure the height and width of the wall as the roof will sit on top of the four walls.
If this measurement has been done before, then there is no need to do it. But if it is not done, then it must be done using the necessary tools.
Step 02:
Now that you know how to measure the width of the room, it will be convenient to measure the length of the rafters.
Divide the width of the room by two and subtract the width of the ridge board. Write the numbers in the book and then calculate and measure the length of the common rafters. You can use online roofing measurements for this length measurement.
Step 03:
To connect common rafters with ridge beams, mark where the cut is required. If you mark it, it will be convenient to cut it later.
Then mark the birds mouth location, birds mouth location is the part of the rafters that will be connected to the walls of the house.
Mark the bird’s mouth location of all jack rafters, common rafters, and hip rafters.
Step 04:
Cut the common rafters, jack rafters, hip rafters all using a round saw. Then cut the bird’s mouth location by using a saw.
Measure the length of the wall and find out how many rafters it will take. Birds mouth should be cut horizontally and vertically
Nailing the hip rafters
Step 01:
Now the main goal is to mark the location of the ridge beam. Make 4-6 common rafters on the side of the wall that is more like a pyramid without connecting the ridge beam. Then nail it with a nail gun. Centering rafters that steady the ridge beam.
Step 02:
Ridge beam centering with nails along the common rafters. Now nail the common rafters to the wall.
Nail the rafters alternately after a certain distance. When you do this, take someone’s help because since you are working on the roof, you should work with the necessary safety.
Step 03:
The common rafters are firmly attached to the end of the ridge board. These rafters keep the ridge beam steady. The king common rafters are structurally identical to other common rafters. Nail it to the hip roof ridge beam and nail it to all corners of the wall.
Nail the rest of the rafters with the ridge beam. After nailing all the places, the ridge board and common rafters can be straightened by themselves.
Finishing the hip roof
Step 01:
Now you will know how to finish the hip roof in the last parts.
The first step in finishing is to nail these jack rafters. Attach the jack rafters to the hip rafters and wall with a nail gun. Before going to the next step, check that the nail has been applied properly
Step 02:
Now that the structure is ready, the top should be covered with plywood.
To use plywood, first,measure the structure and then determine the plywood. Take the whole area of the roof and then divide it by the area of the plywood and find out how many plywood sheets it will take.
Step 03:
Nail all plywood sheets with common rafters, ridge beams, jack rafters, and hip rafters. If you install plywood sheathing starting from one side first, it will be an advantage to install it from one side to the other. Make sure plywood is securely nailed.
Step 04:
And in the last step, you can attach asphalt shingle or other desired materials as you like.
Asphalt shingles are made from asphalt or fiberglass. So the price is low and you can install them very easily. In this way, you can create a hip roof by following the steps of the three main parts and each part step by step.
Advantages of hip roof
1. The hip roof is more stable than other roofs. As it is low around and high in the middle, its durability is high which makes it last longer.
2. Simultaneous snowfall or wind, hip roof is effective in both cases. If it snows, it will fall. It will not destroy the roof from freezing. Again, this roof protects more from the wind than the roof of other structures.
3. As the hip roof is like a pyramid, there is more space in it and more living space is available.
The disadvantages of hip roof
1. It costs more to make a hip roof. Since its structure is complex, it takes more materials to make it.
2. If you do not install the roofing system well, it can cause leaks. If you do not work carefully, there may be some physical damage.
Conclusion
The hip roofing system is different from other roofing systems. The making process is very time-consuming and complicated.
Surely, you have got the answer to “how to roof hip roof” without any complication in the content. The hip roof has some advantages and disadvantages, but the advantages are more. Although a bit costly, it is very useful and stable for different seasons.
While making a hip roof, you should maintain your safety. Since the hip roof has to be done on the upper side of the roof, you should work with caution.
Hopefully, all the questions and problems have been solved in this content.
Best of luck.


